tips

How To Buy Inexpensive Clothes


I'm a big believer in investing in good quality, classic pieces, to last your wardrobe a lifetime - but that doesn't mean you won't find me rummaging the rails of Primark from time to time. There's definitely a place for 'fast fashion' in my wardrobe, but inexpensive clothes don't have to look cheap. When shopping in more affordable stores, I have a few rules I stick to.

Pick good fabrics. Anything thin, nylon, or scratchy is a no go. There are plenty of inexpensive fabrics that still look and feel nice, so make sure you have a good feel of the fabrics beforehand. Primark do some incredibly soft sweaters for around £10, and I always give leggings a stretch to check they don't go see through. Pick dresses and skirts in heavier fabrics, they'll hang nicer and look more expensive!

Be wary of buttons and hardware. Cheap buttons or dodgy zips and buckles can be a massive giveaway of price. I always steer clear of plasticky buttons or anything with a name printed on, and look for shirts with hidden or cute buttons. When it comes to handbags, I try to steer clear of anything with too much metal hardware, as it can fade, crack or look tired much quicker than it should. 

Check the stitching. I always leave things with a wide stitch, not only does it look cheaper, but they tend to fray or come unstitched after a few washes. The hat I'm wearing in these photos, for example, has the tiniest little stitches you've ever seen, making it look and feel more expensive than the £9 it cost. 

Match your metals. Because this dress had rose gold buttons, I opted for rose gold earrings, and a watch with rose gold details too. It helps keep things looking put together and purposeful!

What are your tips for buying inexpensive clothes?


WHAT I WORE
DRESS - PRIMARK // HAT - PRIMARK // SADDLE BAG - PRIMARK // BOOTS - ASH // WATCH - SKAGEN // EARRINGS - ACCESSORIZE // LIPSTICK - NYX MATTE LIP CREAM IN MONTE CARLO

5 Things: Creating A Budget and Sticking To It (Finally)


Anyone who knows me well will be more than aware - I'm something of a serial spender. I've always been something of an emotional shopper, I practically have qualifications in Retail Therapy, and I'm pretty impatient (read, no good at waiting for what I want).

This means that on the whole, I've always been pretty crappy with money. I ran up a massive overdraft during my time at uni, and often picked a new £25 lipstick over paying the internet bill - not an attitude I'd recommend. 

It's taken almost a year since I finished my degree, but I'm in a place now where - no, I'm not good with money, but I'm a damn sight better. I've payed off my overdraft, and I manage, somehow, to make my paycheck last til the end of the month. If you're like me and struggle to stay on top of your finances, here are my top 5 tips.


  1. Address the situation. Burying your head in the sand will achieve literally nothing. Sit down with a print off of your bank balance, and look at where all your money is going. I usually go through and highlight everything I've spent with different colours for bills, food, meals out, and then clothes/makeup/other unnecessary bits I buy, so I can easily see a breakdown of where things are going. 
  2. Pay back. Make getting your bank account into the clear a top priority. Pay off overdrafts, outstanding bills, and any money you've borrowed from friends and family first - or at least come up with an achievable payment plan to pay it back over a couple of months. 
  3. Identify your non-negotiables. The things outside of necessary monthly expenses (bills, rent, food, etc) that you don't want to be without. For me this is coffee, because I work for myself, I often work a day or two a week from a coffee shop to stop me going stir crazy in the house. 
  4. Make a plan. Work out how much you need to allocate for essentials and your non-negotiables each month, so you know exactly what you have left to spend each month. I find that moving all the money for my bills & food shopping into a separate account at the start of the month helps me make sure that money goes where it's meant to! 
  5. Stay accountable. Check your bank balance every few days, write down every transaction in a Budget book (I use this one and it's great), and tell your friends & family you're trying to spend less. That way they're more likely to stop you from eating out unneccessarily, or buying things you don't need!


What are your tips for sticking to a budget? Are you money-savvy, or a spender like me? 

What Nobody Tells You About Working From Home


For a lot of people, working from home is the end goal - because who wouldn't want to spend all day in their PJ's or work from bed? 

The reality though, often isn't quite so glamorous. 

You'll work more. This is two-fold, you'll get more work done at home in the same time you'd have spent at work, but you'll also spend lots more time working. First it'll be working through your usual commute time, and eventually you'll find yourself struggling to tear yourself away from your laptop for evenings and weekends. 

You'll clean more. Because if your home is a mess, you'll find it near impossible to concentrate on getting work done. 

Your Starbucks bill will be huge. Because you will just be desperate to get out of the house and work anywhere else.

You have to be your own boss + editor. Which means you have to be a lot harder on yourself than you are used to. You have to stay on top of yourself, do things you don't want to do, and be aware of your own weaknesses & errors. 

Everyone will always assume your free. Your friends will think you are free at all hours of the day, and probably be offended when you decline invitations due to work. 

It's lonely. You'll pounce on your significant other as soon as they walk in the door, desperate for someone to talk to. Which is why it's so important to have fellow freelancer friends!

5 Things: Curating a Timeless Wardrobe


I'm not a big clothing shopper - I find it hard to find clothes that fit my shape (tall with broad shoulders, big boobs & hips but no bum whatsoever) and that I like, so I tend to buy things and wear them to death. Because of this, I tend to gravitate towards great quality clothes that I know I'll love and wear for a really long time. I want my clothes to be timeless, because it took me so long to find them inn the first place!

I didn't used to be this way, I used to be a ride or die fan of fast fashion, splurging on a monthly basis in Primark. Turning my wardrobe around wasn't easy, but it was well worth it - and this is how I did it. 


  1. Start over. Eliminate clothes that don't fit the brief, clothes you've only worn once, clothes that have holes in, clothes that feel cheap or uncomfortable. Get rid of the 'filler' clothes, and keep what you really love. 
  2. Simplify. Do you have the basics? Do you really need that neon pink skirt with laced overlay and scalloped edges? Look for clothes in classic cuts and colours that you know you'll still love in 5 years time. 
  3. Choose flattering cuts. If your bum looks great in Skinny Jeans, don't buy boyfriend jeans just cause they're in season. Stick with clothes that suit you and your body shape, rather than trend led pieces. That doesn't mean to say you can't buy on - trend clothes, just look for pieces that follow trends whilst flattering you, that you feel 100% comfortable in. 
  4. Invest in staples. Good jeans, a great coat, handbags - that kinda thing. Spend money on the things you know you'll wear for years and years. 
  5. Pick fabrics carefully. Timeless, beautiful pieces don't have to cost the earth. Look for more budget friendly pieces that are made out of great fabrics, and have expensive looking embellishments. Steer clear of anything with cheapy zips or buttons.

Are you a trend follower or a classic kinda dresser?

Being Productive When You Have Nothing To Do


Maybe it's a quiet week, or maybe you've just totally bossed your to do list - but you've done everything you needed to by 2pm and you're wondering how to fill the next three hours. 

Sure it might be nice to grab a carton of ice cream and settle in to watch cat videos & read Buzzfeed articles - but what about using the time productively? 

Sometimes, the most satisfying thing in the world is to keep being productive even after you've done everything else. But how to fill that time? 

- Organise something. A cupboard, your planner, your desk or the files on your computer. Tackle an organisational mess you've been putting off forever. You know what they say - tidy house, tidy mind. 

- Put a date in the diary. A coffee catch up with friends, a course to help you further your social media skills, a meeting with a great contact. Use the time to make your time ahead even better. 

- Set new goals. Take some time to reasses your goals, and create actionable steps to achieve them. Plan out dates to achieve them, and rewards for getting there!

- Prep Instagram photos for when you're busy. The key to a successful Instagram account is regular content, so spend some free time shooting great Instagram photos for the next time you're busy. 

- Tidy up your Pinterest boards. The Pinterest algorithm favours content that has lots of interactions, so delete stuff that didn't do so well, organise your boards into a system that makes sens, change up your cover photos, and get pinning! 

- Learn something new. Sign up for a new class on skillshare, look for a new webinar on creating awesome content, or look for a class near you on a skill you've always wanted to hone. 

- Read an inspiring book. Currently on my bedside table is Big Magic. 

- Fix broken links & update blurry images on your site. One of those things that needs doing regularly, but we always put off because it's so time consuming. 

What are your top tips for filling time productively?

Embracing Pattern


If you were to open my wardrobe, you would find a whole host of clothes in one very specific colour range - black, white and grey. I'll hold my hands up and admit to being the least experimental person ever when it comes to clothes, I like classic cuts, plain colours and - well, black. 

But every time the whether starts to perk up, I start daydreaming of a Spring wardrobe filled with colour, flowers and importantly, patterns. 

But everytime I try to incorporate these elements into my wardrobe, I just don't end up wearing them. SO, this year, I've tried really hard to find patterned pieces that do work with my strictly monochrome wardrobe, and that I've actually been really enjoying wearing. 


Insert stage left these babies from H&M. I picked these up on a desperate shopping mission last week when I was basically going "Oh my god it's so effing hot in England and all I own is black skinny jeans". I love that they're loose fitting whilst still being a slim cut, so they're still quite flattering. Whilst yes, the print is kinda nuts, it's not too bright and colourful that I don'w feel comfortable in them. 

They're super soft, with a stretchy waistband that my food babies appreciate. I ended up sizing up in these to get a fit that I liked, but I am so pleased with them, I'm thinking about picking them up in a few different colours!

And the best part of these trousers? The price! At £7.99 I may just go back and pick up a few more pairs. 

My Tips For Making Patterns Work

- Pick one patterned item, and balance it out with plain pieces. I always opt for a plain black, white, or grey oversized tee with patterned trousers and skirts, or skinny jeans with a patterned to. 
- Stick within your colour scheme. If you're not used to patterns, ease yourself into it gently with clothes that fit in your usual colour scheme - you'll never wear something bright and patterned if you're used to dark plain clothes.
- Think about the fit of your clothes & the size of the pattern. I never wear small, intricate patterns on loose fitting tees because I know it makes me look HUGE, but I know that small patterns on fitted trousers actually makes my legs look longer - woohoo!
- Keep everything else simple. Steer clear of fussy bags and crazy hair, and let your pattern be the star of the show!

Are you guys pattern lovers?

When Things Aren't Going Your Way


We all have those days where it feels like the entire world is working against you, in fact, they might just be called Mondays. And sometimes, when these days happen, it can be really hard to turn things around. Today I want to talk to you about ways you can turn it around, because really, nobody wants to have a day like that, right?

Take ten.
Allow yourself a breather, step back and let yourself just pause. Sometimes just taking ten minutes for yourself, step back, make a cup of tea, or go for a walk. Coming back to a big old mess with a fresh mind can make the world of difference, against trying to fix problems when you're lost in the issue. 

Identify what's going wrong.
Instead of fighting a faceless monster, identify what's wrong. Is it technical, is it something you're doing or your approach to the task? 

Reassess your goals.
What are you trying to achieve right now? How can you achieve these goals in a different way? Take a few moments to think about another way you can reach your end goal that avoids the issues you're facing.

Ask for help.
'The only mistake you can make is not asking for help.' There's no shame in asking for help, but there is in refusing help. If you know someone can help you, let them.

Keep your chin up.
Don't let the stress keep you down! A positive mental attitude can work wonders.

Talk it out
Talking through a problem with someone you trust can help you see other alternatives and solutions. Or at least, they can offer you some motivation!

Take note.
Of what went wrong, and how you can avoid a similar situation in the future. It's only a wasted opportunity if you don't learn from it!


How do you turn a bad day good? 

Boyfriend Jeans 3 Ways


I honestly never thought I'd be writing a post like this because, in all honesty, I never thought I'd own a pair of boyfriend jeans, much less like them. Skinny jeans have been my jam for as long as I can remember, but in a recent moment of madness I picked up a pair of boyfriend fit jeans and I bloody love them.

The jeans in question are these the American Eagle Tomgirl Jeans. They're pretty heavily distressed, my granddad likes to comment on them as 'You look like you've been down the mines' (grandparents, sigh), but the distressing was actually the key for me. I tried on a few pairs, looking for something a little more comfortable than my skinnies, and without the distressing they just looked a bit weird. So top boyfriend jean shopping tip - try on loads of different styles and colours, and don't be discouraged if you try on a pair and hate them.


Look One - Beach Ready - almost.

This first look is basically an amalgamation of all the items I just wanted to throw on when I first tried these boyfriend jeans on. We're talking crazy bed hair, loose fitting beachy tee, with a cute bralette poking through, and my favourite western style heeled boots. On the top half, I felt beach ready, but the boots made me feel a little smarter than if I paired it with flip flops. Comfy, casual, and cute, right? 

TEE - AMERICAN EAGLE // BRALETTE - AMERICAN EAGLE // BOOTS - ASH


Look Two - Smart Casual.

I've been wearing these jeans to business meetings. Yup, I made them work. Paired with a sheer shirt, nude heels, and a smart bag, these can be dressed up, and I actually got a bunch of compliments on them. The tip here is to pair it with a shirt that has expensive looking embellishments - no cheap buttons here!

SHIRT - ALL SAINTS // HEELS - SCHUH


Look Three - Sunday Style.

You can basically make any style of jeans look good when they're paired with breton stripes and these are no exception. An oversized breton tee half tucked in, paired with a chunky statement necklace, oversized tote, and comfy slip on flats. Perfect for running errands or lazy Sundays down the pub. 

TEE - ZARA // SHOES - KURT GEIGER


Are you a fan of boyfriend jeans? How do you like to style them? 

Travelling As A Couple - What To Expect


Relationships are hard work on a normal day, so it would be foolish to expect travelling with your significant other to be plain sailing, easy as pie. If you're planning your first trip as a couple this summer, you're in for a great time, but there are likely to be a few surprises too.

In fact, travelling with anyone new for the first time can be tricky. We all want and expect different things from our vacation time, and that's totally fine, but it's important to prepare for that too. 

Whilst holidays are all about fun - there are guaranteed to be a few stressful moments thrown in there too. Delayed flights, lost luggage, sunburn, language barriers, there are lots of things that can go wrong, but getting through these things without falling out will guarantee you return home closer than ever. 

Know what each other expects from your trip.

If one of you is a lounge lizard with plans to lay by the pool, and the other fancies themselves as an Indiana Jones Explorer, it doesn't have to be a deal breaker. Have a chat before your trip to find out what each other wants to do, and plan out how you can get a good mix of activities, and make all of them fun for both of you. 

Be prepared to compromise.

For me, it was accepting that my boyfriend will never be able to spend a whole day poolside, and that's okay. I love exploring, but I also love being able to relax, so we compromise, mornings exploring before it gets too warm, and afternoon dips in the sea. 

Prepare, and prepare again.

Advance planning really can't hurt you. Pick up a guidebook, learn some basic phrases in the local language, and make sure you have all your necessary documents to hand. It'll help avoid those silly little unnecessary arguments.

Don't feel like you have to do everything together.

If you were at home you wouldn't spend every second of every day together, and your vacation doesn't have to be the same. If you want a spa day but your SO can't stand the thought, book it just for you, or if your other half is a gym monkey but you want a lie in, part ways for an hour or two! Not only will it keep you both sweet, a little time apart will stop you getting on each others nerves.

Let the little things go.

Okay, so it might drive you mad that he's not unpacked his suitcase, or he leaves his wet tiles on the floor, but cut them a little slack. They're on vacation, and it's not worth arguing about. 

Discuss your budget.

I've known holidays go on holiday together blissfully happy and return on the brink of disaster because of money. Some people will approach a holiday as a time to loosen the purse strings and splurge on as much gelato as possible, whilst others will want to stick to a strict budget. Discuss your budget together before hand so you can be on the same page at your destination.


The most important thing to remember is that travelling as a couple is an AMAZING experience that can really strengthen a relationship & be the time of your life. Life is all about collecting amazing memories and experiences, so remember that and you'll have a blast! 

Do you have any tips for travelling as a couple?

Establishing Your Photography Style


It's taken nearly four years of blogging for me to get into my photography groove - I've gone from out of focus photos taken in warm artificial light, to finding an image style that really works for me. Whether you're a blogger or an Instagram addict (or both), having consistent imagery that can be easily identified as yours can be massively useful in growing your following and brand.

Obviously this isn't for everyone, there are no rules for blogging or Instagram, you can post whatever you like, but it can be a fun experiment to create a brand identity for yourself through your images!

Step One - Have an idea of what you want to achieve! What kind of images are you drawn to? Bright and airy images, or dark and moody? Is there a colour palette you're excited about? Do you like busy images or clean lines and blank space? Spend some time looking at the kind of images you like, create a Pinterest board, allow yourself to be inspired. 

Step Two - Do some planning! Think about places you'd like to shoot, things you'd like to experiment with taking photos of. Plan out shots to try and ideas you like so you can take photos in bulk. 

Step Three - Experiment! Lay out products or set up scenes, experiment with different angles, lighting, product placement. A lot of getting a good product shot is trial and error, often I'll start shooting something from a birds eye view, and then decide it looks better with the products stood up at eye level, or vice versa. Try lots of combinations of the same photo, you never know what will look good!

Step Four: Work in bulk. Take your photos & edit them in bulk, so you are more likely to end up with consistencies across all your images. Block out a space of time when the light is good to take photos to last you a week or two! 

What are your top tips for consistent images?

So You Want To Start A Blog


After the positive reaction to my blog post last Sunday, I thought I'd make this whole blogging tips thang a regular occurrence. In the comments & on Twitter a lot of you were asking for more advice on where to start with setting up a blog, so that's what we're gonna talk about today. I'm going to talk today more about the decision making process than the technical stuff, because there's loads of information available on that (try searching how to make a blog on Pinterest!).

Setting up a blog can be pretty daunting, it's hard to know where to start. I think the most important thing is to remember that it doesn't have to be perfect right out the gate, hell it doesn't have to be perfect at all. I've been blogging for four things and there are always things I want to change and improve on - and that's a good thing. If you're always trying to improve, you're doing the best you can.

The best thing to do when thinking about starting a blog is to sit down with a big old piece of paper, and make notes. Create a big blogging brainstorm, right down every idea you have. The kind of posts you love to read and the kind of posts you want to write. The things you want to offer your reader, the styles of post you like to read. What you want your blog to look like and how you want to come across - all these things are so important. Get it all down on paper, and look at it as a kind of goal sheet. 

Then take a smaller piece of paper and write down the topic, title and the date you want to have your blog up and running by. Stick it somewhere you will see it a lot, on your desk, in your planner, on your computer, so that you're always reminded of it. 

And then, before you start doing anything, even creating a Blogger or Wordpress account, write a few posts. Figure out your style, how you want to address your audience, and what you find easy to write about. Doing this first will make style and name decisions easier down the line. 


Contrary to popular belief, running a blog does not have to cost you a small fortune. You don't need a domain name, an expensive hosting service or a new camera to start a blog. Sure, somewhere down the line you may want one or all of these things, but they certainly aren't essential to having a blog. What if you start blogging and realise you hate it a few months down the line? Set yourself up with a .wordpress or .blogspot address to start off with (I personally would recommend Blogger over Wordpress for newbies as it's a lot more user friendly!). Nothing is permanent and you can make changes and investments if you want to further down the line. 

So sign up for an account, find yourself a cute design you love (there are plenty of free ones available online that are great), and introduce yourself! Let your future readers know what they can expect to find there. 

Don't forget that the whole point of blogging is to enjoy what you're doing and well, you're not going to get very far if you spend all your time doing what everyone else is doing, or only being in it for the freebies. Write a blog because you want to share something you're passionate about! 

5 Things You Need For Your Blog


Whilst chatting with a friend last week about my work as a freelancer and my blog, my friend said, "The blogging world is so odd. Its like MI-6, everyone knows it exists but finding info about what really goes on beneath the surface is difficult." and it really got me thinking. Because she was right, generally bloggers are secretive about their blogs, their success and how to get it. Now, I'm very much of the mentality, 'share and share alike', so I started to wonder why I wasn't sharing some of my knowledge.

So here we are! Today I thought I'd talk to you about some of the things you need to make a killer blog. These aren't physical things per se, but rather things that will only improve your blog, and how it is viewed by readers, fellow bloggers, and brands alike.

1. Strong, consistent branding. Brand is everything when it comes to your blog. Take some time to sit down and answer some questions. Why are you blogging? Why should someone read your blog? What are your core values? Everything on your blog should reflect the answers to those questions, and your branding should  reflect that too. Create logos you can use across your social media platforms so people will recognise your blog. Have a consistent theme to your photos, so people will look at a photo and recognise it as yours.

2. A blog email address. Whether you're talking to PR's, brands, fellow bloggers, or even the Bloglovin' help team (who, incidentally, are fantastic), you won't be taken seriously if your messaging from groovychick93@hotmail.co.uk. You don't have to splurge on your own email hosting if it's out of your budget, but a simple yourblogname@gmail.com will go a long way towards increasing your reputation.

3. A disclaimer policy. For brands who want to collaborate with you, and readers who want to know if you're genuine. A disclaimer policy should state your ethics really, and let brands know whether you're open to sponsorship deals.

4. A media kit. If you're interested in working with brands, or accepting advertising, you need a media kit. One document that will tell brands and PRs everything they need to know about your blog, so they can decide whether you'll be a good fit!

5. A clear profile photo on your blog, & a killer about page. All your readers want to know what you look like! It makes you seem more personable and has been proven to increase reader engagement! The same can be said for an about page. Tell your readers about you and your blog, what they can expect to find and why they should definitely follow you!

I hope you found this useful! Let me know if there are any other blog topics you'd like me to cover down in the comments! 

DIY Autumnal Beauty Product Recipes


Making my own beauty products is one of those things I've been meaning to do for the longest time, but just never got around to doing. So when Mira Showers and Midas Touch Crafts asked me to give it a go as part of their #MiraMessMakers campaign, I decided it was about time I ticked it off the to do list!

I headed off to Sainsbury's to buy normal household ingredients to use in the recipes! It worked out much cheaper than buying the products ready made, and I could make a lot more! I'm all for a bit of thriftiness! 


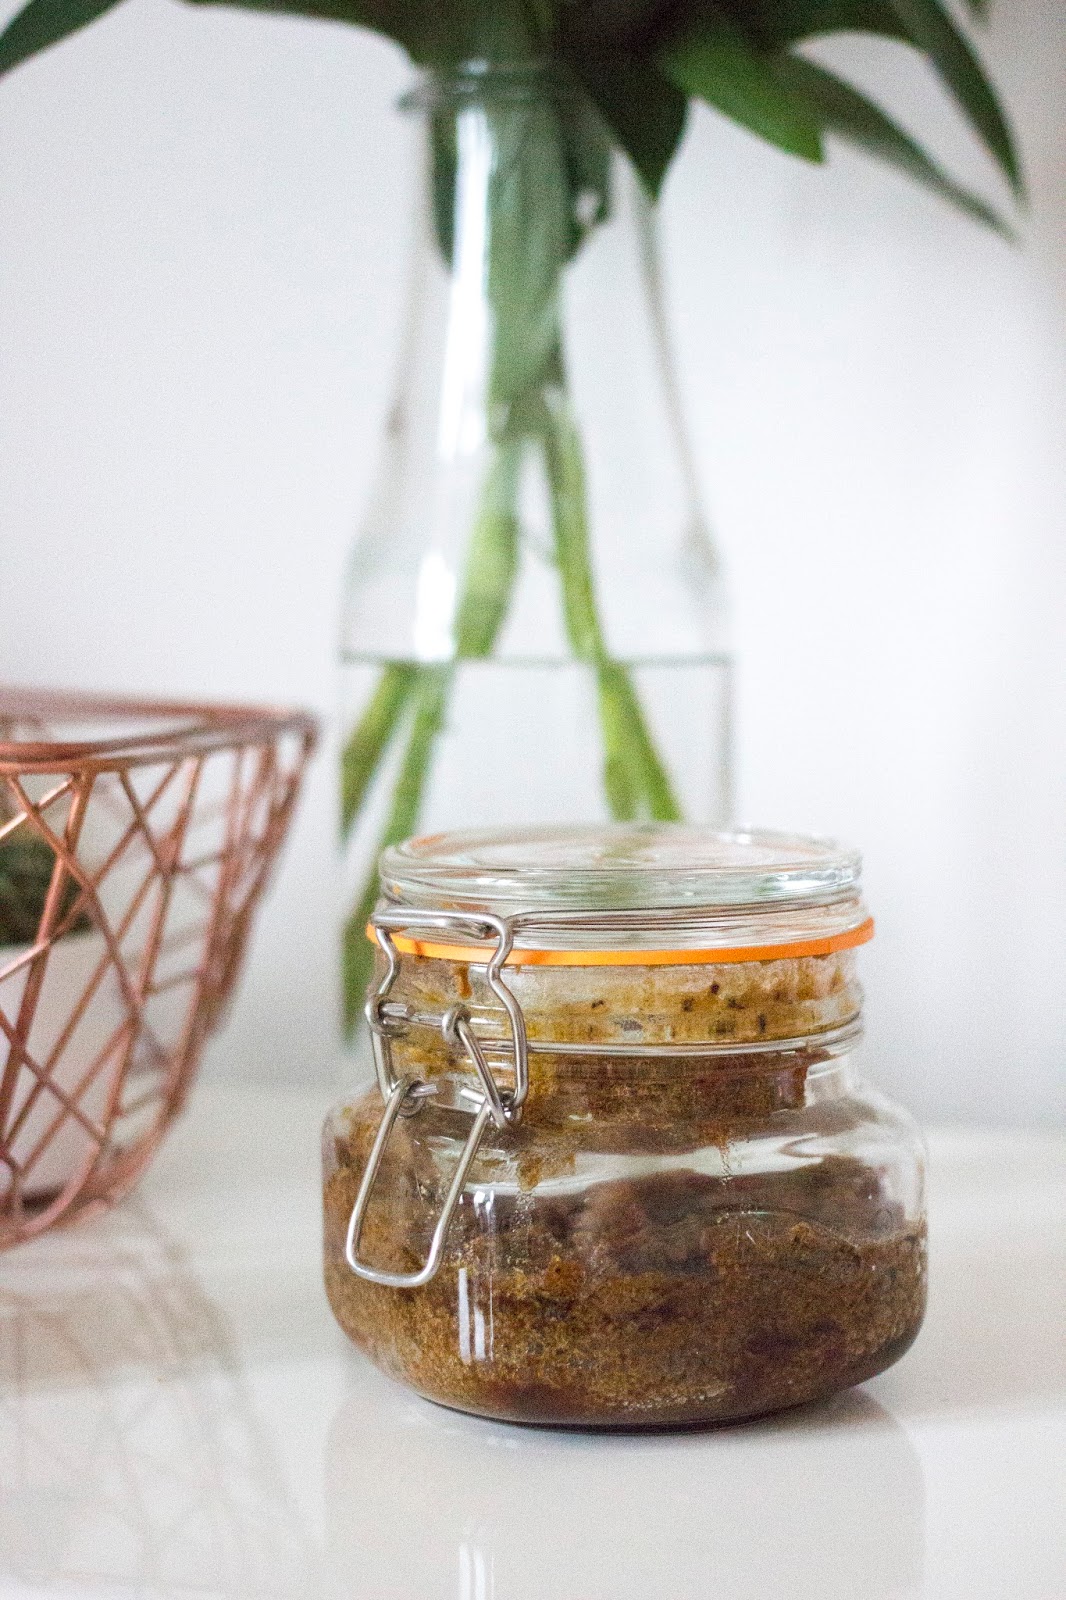
The first recipe I tried was for a simple lip scrub. I love the Fresh Sugar Lip Scrub but it's super expensive, so I wanted to try and replicate the texture of it. This recipe was super simple, just mix Coconut Oil, Brown Sugar, Cinnamon and Honey until you reach your desired consistency. Super easy, super effective and super tasty too.


I figured I'd go seasonal and try a pumpkin spice recipe next, and it worked out much better than I expected. I bought a munchkin pumpkin, and cooked it up, before blitzing it in the blender. I then mixed in two cups of brown sugar, a cup of coconut oil, a teaspoon of vanilla essence, three chai tea bags (just cut them open and dump the contents in), and a teaspoon of cinnamon. Mix it all up for a gentle but effective body scrub! 

I did also attempt a yoghurt, honey and oats face mask, but it was a TOTAL disaster! Not all recipes are good!

I actually found making these really therapeutic, and I've loved using them! I definitely want to give a few more DIY beauty recipes a go, let me know if you have any recommendations! 

Have you ever made your own beauty products?

10 Weekend Beauty To Do's


When Sunday rolls around it's normally a day devoted to long walks in the park, coffee dates and prepping for the week ahead. I normally have a little list of chores to tackle, and this week I'm making it all beauty themed!

  1. Clear out. There's no time like the present to clear out the makeup stash of anything expired, unused or unloved. A pre-Christmas clear out is definitely in order for me this weekend, I'm going for the ruthless approach - you can see my tips for a good clear out here.
  2. Clean up. Post clear out, go in for a good cleaning, antibac wipes at the ready for storage, acrylic is a fingerprint hoarder!
  3. Wash brushes. A task I'm always putting off. I like to use my Tea Tree Dr Bronners Magic Soap for a good deep clean. This is always a job that takes a good hour so Netflix on!
  4. A beauty rejigg. Have a good sort out, and pull out products that deserve a bit more love, and break out of your beauty comfort zone. I'm terrible for reaching for the same products every day, so a good move around helps every now and then.
  5.  Make a wishlist. And if the products are still on there at the end of the month, treat yo'self.
  6. Get inspired. Head to Pinterest for some beauty inspiration (and check out my beauty board while you're at it).
  7.  Paint your nails. I hate painting my nails, I can't sit still long enough to not smudge them. I've got a beautiful Rimmel polish calling my name though, so it will be done today!
  8. Deep condition. Because your ends deserve a little TLC.
  9. Moisturise. Because your skin does too. 
  10. Play! Experiment with a neon eyeshadow, try out a graphic liner, or practice your contour skills. Don't forget that makeup can be fun!

What's on your beauty to do list?

Tired Eye Fighters


We all have those mornings where we wake up and it feels like your eyes have just given up on you. For me that's normally every day ending in a Y - getting out of bed is my least favourite part of the day.

Lucky for us though, the beauty world has developed a few products that make mornings, well, not quite pleasurable, but certainly more bearable.

I start off with a few drops of the Optrex Rehydrating Eye Drops for Dry Eyes, to get rid of the dry, itchiness not enough sleep leaves me with. I then go in with the First Aid Beauty Eye Duty Triple Remedy, the peachy cream helps neutralise dark circles, whilst hydrating and cooling the under eye, making them feel less tired.

I normally give that a few minutes to work it's magic before going in with make up. I love the Maybelline Instant Age Rewind Concealer in the brightener shade, but it's pretty hard to get hold of outside of North America. A good alternative is the Benefit Erase Paste, although admittedly pricier. I do find this needs setting with a good powder, but it's peachy tones and soft texture make it perfect for making the eyes look naturally more awake. 

I also like to give my lashes a few pumps with the Shu Umera Lash Curlers, which gives a little lift and curl, and makes my eyes generally more awake. I've tried a lot of lash curlers but these are by far the best I've used!

What are your top tips for soothing tired eyes?

How To Keep Away Seasonal Affective Disorder


It's inevitable, Winter is coming. The days are getting shorter, the nights (and days) are getting colder, the rain is coming down, and last week I spotted tubs of Celebrations in Tesco. Whilst Winter brings with it a lot of happy things (Pumpkin Spice Lattes, blanket scarves and CHRISTMAS, to name but a few), it can also bring a lot of gloom too. It's estimated that more than 10% of the population experience SAD, whilst up to sixty percent of us get some form of winter blues, so in the spirit of keeping everyone happy, here are my top tips for beating SAD.

  1. Get up when the sun gets up. If your schedule permits of course. Our bodies use light queues to function, and not getting the right light can really mess with your internal clock. Get up just after dawn, get your curtains open, and allow your body to find a natural routine. 
  2. Take the right supplements. The vast majority of the population would benefit from taking Vitamin D in the winter months, to help counteract the effects of less sunlight, but there are other supplements that could help you keep your summer perk too. Take Vitamin C to help fight the winter sniffles and Magnesium to ease anxiety!
  3. Invest in a SAD Lamp. It doesn't have to be a fancy alarm clock one, I have one that's just a little desk lamp and I keep it switched on whilst I work. SAD lamps emulate the sun's wavelengths, and just 30 minutes exposure to a SAD lamp a day can drastically increase your serotonin production.
  4. Eat small, regular, balanced meals. Seasonal Affective Disorder has a nasty habit of making you crave bad carbohydrates, and fatty foods. By making sure your body is receiving small and healthy meals at regular intervals throughout the day, you can help keep your mood level, and stop any cravings!
  5. Eat more green veg. Nobody enjoys eating green veg, especially when all you're craving is a Bargain Bucket and bag of Doritos, but green veg is PACKED full of delicious nutrients that your body craves. Eating more of them does wonders for your mood, metabolism, skin, energy levels, pretty much everything you can think of. 
  6. Make plans and keep plans. When it's already dark as you leave work, it can be so easy to just go home and snuggle up with Netflix. It's easy to forget that there are just as many hours in a day in Winter as there are in Summer, and not make plans, but having things to look forward to throughout the week, even if it's just a coffee date with a friend, can make a massive difference. 
  7. Look good, feel good. I'm terrible for spotting grey skies and immediately pulling on old leggings and a cosy jumper, but taking time over your appearance, whether it's wearing a new dress or busting out your favourite red lip can boost your mood to no end. 
  8. Go outside anyway. Even if it's dark and rainy, put on a thick coat, and go get some fresh air. Find a route near your house that you can walk in twenty minutes, and pledge to walk it every day, whether that means setting your alarm twenty minutes early, or a post-dinner walk.

Makeup Storage Solutions for Awkward Spaces


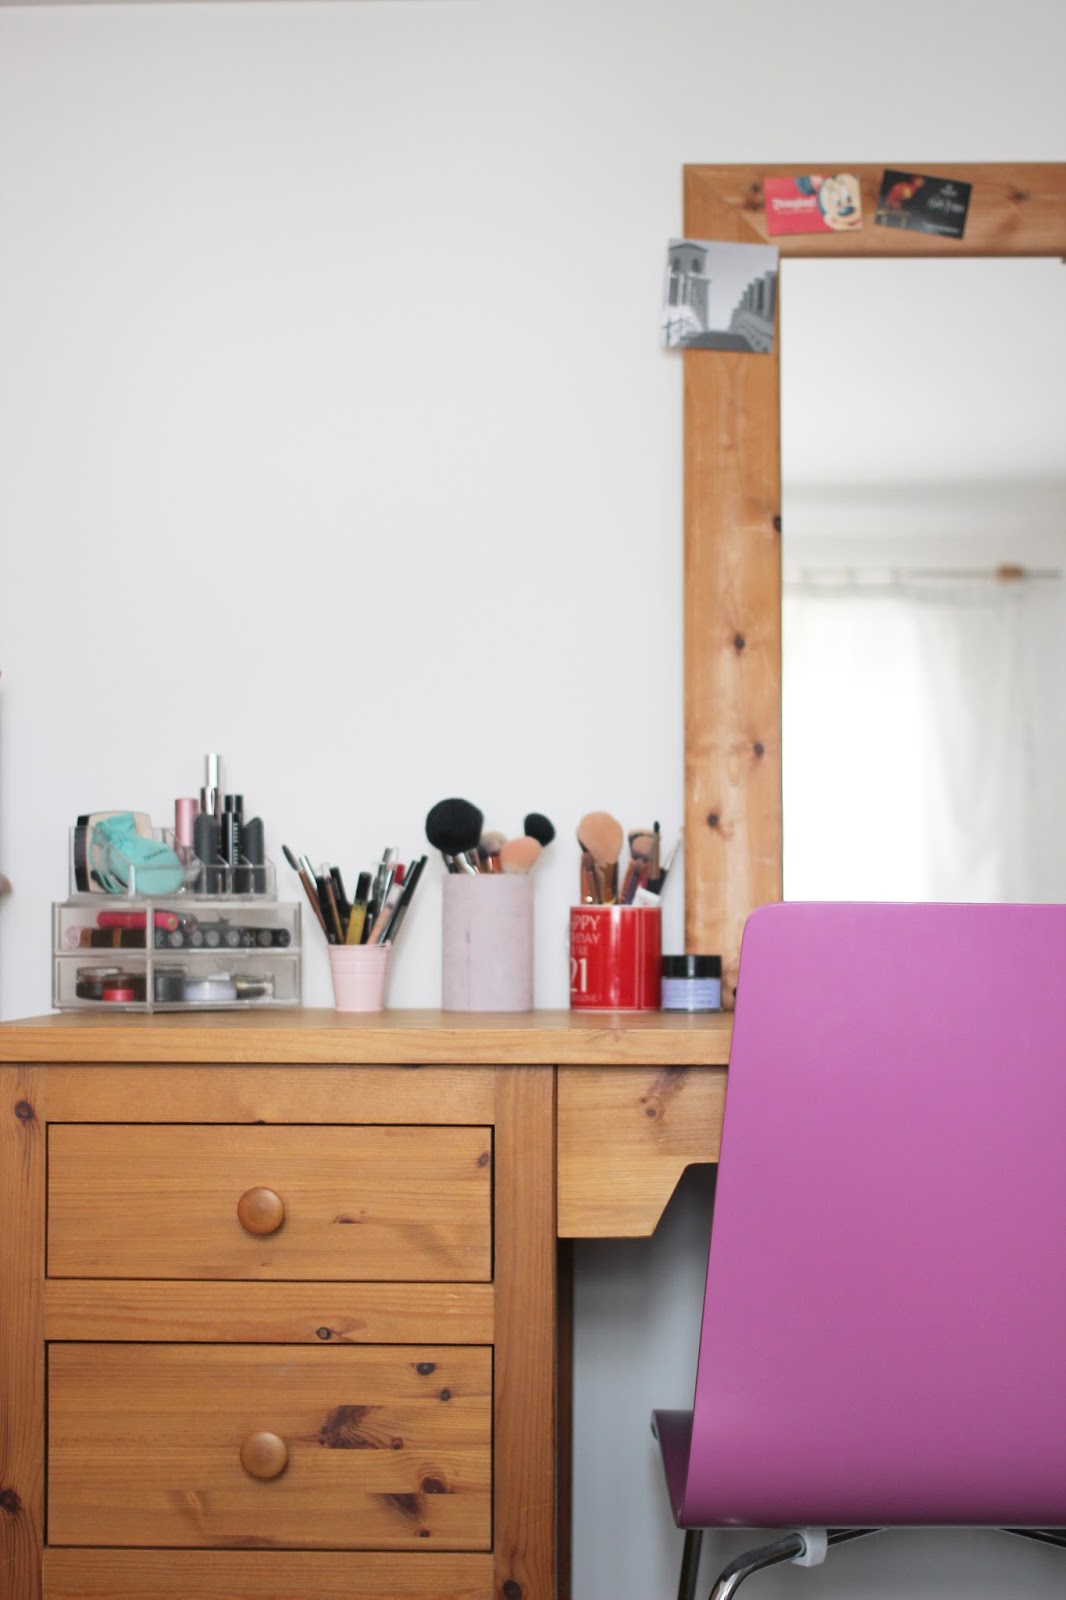
Meet my dressing table in my bedroom back home. I have a love hate relationship with this table. I love it, because it's the first dressing table I ever had, after wanting one so desperately for so long. I do however, hate it, because it's awkward to store makeup in. And it's Pine. I hate Pine.

Whilst the pine is an easy problem to fix (I'm planning on painting it over the next few weeks), the storage problem is a little trickier to overcome. The drawers are a little too deep to be good for easy makeup storage. Until last week, I had all my products just sloshing around in the drawers which is not ideal at all, but after a quick trip to Ikea last week, I think I've come up with a compromise.

I keep all my lipsticks in a set of Muji drawers on the top of my desk, and I have a little pot with liners in too. It's worth mentioning that this isn't my full makeup collection either, just an edited collection that I bought back to Bournemouth.


I picked up this set of three cardboard boxes (I can't find them on the Ikea website, but they're recent from in store) from the 'Home Organisation' section, I'll admit I was drawn in by the pretty mint lids. The set comprises of one large, A4 size box, and two half size boxes, all around three inches deep. The top drawer is the shallowest, so I put the larger box in here, and filled it with base products and palettes. Along the side I've put all my pan products, and they fit quite well, without rolling around and it's easy to find what I'm looking for. 

 Drawer two is slightly deeper, so there was room for the two smaller boxes to be stacked. In the bottom box I keep useful things I don't necessarily need every day, included but not limited to travel minis, eye drops, lash curlers, nail polishes and eye drops. The sorta stuff it's handy to have, but you don't use every single day. In the upper box I keep all my mascaras, and a few awkward shaped makeup bits that don't fit in elsewhere!

Down the side of the boxes is the perfect space for my fragrances, I like to keep them in a drawer so they're out of the direct sunlight, but still easily accessible. 

Behind the boxes I have an old Muji container stuffed with concealers, lipglosses, primers and other assorted tubes. They're sort of organised but not really. I've got a couple of packets of makeup wipes, my makeup bag stuffed with the products I'm currently using daily, and a few bulky bottles, my makeup setting spray and brush cleaner. I also keep my hand cream and Tangle Teezer in here so they can be on hand.

It's still not ideal, but it's much better than it was before!

How do you store your makeup?

Travel Prep Not To Forget


When you're heading off on your travels, the lead up can be a whirlwind of stress, and it's easy to forget things! I'm always paranoid before a trip that I'll forget something important, so I've compiled a list of things that are easy to forget (beauty and otherwise!), so easy in fact, I've forgotten to do all of them!
  • Prep your feet. The amount of times I've gotten onto a hot sandy beach and realised that my ballet dancer feet are looking worse for wear. Nobody wants to waste precious holiday time painting your toenails, so don't forget to give your tootsies some TLC before you leave.
  • Write a list. Not only will you pack smarter, but if you take the list with you, you won't leave anything behind!
  • Update your iPod. I update my iTunes about once a year, I'm awful for listening to the same album on repeat for six months. Holiday time is the perfect time to sort through your music, and make sure you've got an awesome playlist on hand.
  • Charge all your devices. iPads, camera batteries, laptops. Charge them all up.
  • Pack an extension lead. Because there's never enough charging ports in hotels and they're never close enough to the bed either.
  • Reorder any prescriptions. The amount of times I've been packing the night before a trip, and realised I've only got three days more tablets left. 
  • Pick up a lip balm with SPF. Because burnt lips are no fun at all.
  • Download apps and maps you might need. Whether it's a quick translator, or a city guide, get it all on your phone before you leave.
What are your pre-holiday must dos? 

After A Swim


When the weather's hot I love nothing more than taking a quick dip, whether that be in pool or sea, but I hate how chlorine and salt leaves my body and hair feeling. It's all very well being able to cool down, but no good if you feel gross after! 

My skin is so easily affected by change in water, so I like to have a good cleanser on hand to keep my skin balanced. I always comes back to the Origins Checks and Balances Cleanser, because it really leaves my skin feeling deeply cleansed but not stripped. 

The same goes for the rest of my body, and I've found the best thing to stop my skin feeling dry and stripped is the Sanex Dermo Protector Body Wash. It's incredibly gentle and it just leaves your skin feeling soft and clean.

Hair is a little trickier to manage, and I hate having to style my hair after a swim so I like to take the easiest route! I wash my locks with the Herbal Essences Fresh Balances Shampoo, which is the best clarifying shampoo I've found, it really removes anything in your hair without drying it out. Post shower I use a Tangle Teezer to comb through, and generously spritz my locks with the Bumble and Bumble Surf Infusion Spray before blow drying. This gives my hair a naturally tousled texture, without much effort. Blast with a hairdryer and you're good to go!

What's your post dip routine?

Hand Luggage Packing Tips + Free Download


I originally had this post on hold until mid July, just before I go away on holiday, but I figured a lot of you are could be jetting off sooner so I bumped it up!

Is it really strange that I LOVE packing? Whenever I know I have a trip coming up, I spend ages meticulously putting together the perfect luggage, sad I know, but it excites me! Today I want to chat about packing your hand luggage for a flight! It can be tricky to know what to leave behind and what to make a cut, so I've put together a little printable packing guide! There are spaces for you to add in anything I've missed that you might need, and I've tried to keep it as general as possible!

The beautiful illustration in this guide was created by the incredibly talented Roisin Swales of Pickle Draws for my magazine. It's such a gorgeous illustration that I just had to find a way to share it with you guys too! Click here to check out Roisin's Facebook page, and here to find her on Etsy! Her illustrations are stunning!

Keep scrolling down to see my tips too!

  • Write a list, and pack it. Not only will writing a list keep you from overpacking, but when you're at the end of your holiday having a list of everything you packed will ensure you don't leave anything behind!
  • Pack bags within bags. I like to keep everything as organised as possible inside my carry on, and little bags are the trick here. A little bag to keep all your cables together, a little bag to keep all the things you might want in flight (headphones, gum, a book etc.) together. That way everything will be easy to find.
  • Always pack a spare pair of clothes. Because you never know when the arirline is going to loose your luggage.
  • Pack from the bottom up. Pack things you won't need during the flight (a change of clothes, or your beauty bits if your flying short haul) at the bottom, in flight entertainment things (iPad's, laptops, books, etc.) in the middle, and your important stuff like tickets, passports, and purse at the top. It just makes sense, and it'll save you rummaging around your bag in the airport.
  • Always take fluffy socks, and a scarf. You never know when your feet will be cold, or you'll want to take your shoes off and get cosy. Scarves are so handy to have, use it as a scarf, a blanket, a pillow, or pop it on a seat that doesn't look the cleanest.
  • Always pack an empty waterbottle. They're just handy. I like to take my Bobble Bottle, so I can fill it up at any tap in the airport or at my hotel, and have filtered water.
  • Take Vitamin C Tablets during the flight. To ward off the dreaded post-flight lurgy. 
  • Take snacks! Because airport food is expensive, and airplane food is, well, crap. And if you don't eat it whilst you're travelling, it'll come in handy at some point during your trip! Don't forget hard boiled sweets or gum for take off and landing!
What are your top packing tips? Are you headed anywhere nice this summer?

Latest Instagrams

© Jaye Rockett. Design by Fearne.